{power({subtract({divide({add({multiply(10; 2)}; 12)}; 8)}; 1)}; 2)}
Workflow
Table of Contents
Advanced OpenWorkflow (AOW) is a module for SuiteCRM, allowing users to create custom workflow processes. This module allows users to trigger various system actions based on conditions from any SuiteCRM module.
Creating a Workflow Process
You can create workflow processes by navigating to the 'WorkFlow' module within SuiteCRM. Click the 'Create WorkFlow' button within the action bar to start creating the process. The first panel allows users to set up the workflow process.

This allows you to specify the following:
-
Name – The name of the process.
-
Assigned To - The assigned user of the workflow process.
-
WorkFlow Module – A drop down list of all the modules found within the SuiteCRM instance. This is the module the workflow is run against. For example, When an Account is created/edited.
-
Status – Active or Inactive. Only active processes will run.
-
Run – Always, On Save or On Scheduler.
-
Run On – All Records, Modified Records or New Records.
-
Repeated Runs – If checked, the process will continue to run over and over. Ideally this should only be checked if one of the specified Actions negates (or will lead to the negation) of one of the specified Conditions.
-
Description – A description of the process.
Conditions
Adding Conditions
Once set up, you can add conditions to a workflow process using the conditions panel. This allows users to specify the criteria that should trigger the workflow actions.

To add a Condition Line you must click Add Condition
You must select your WorkFlow Module on the first panel before adding a Condition Line.

You can have an unlimited amount of Condition Lines. To add another line click Add Condition again and it will appear. On the line you will have four fields; Field, Operator, Type and Value.
Field and Operator
Field is a drop down which automatically populates with all the fields found in the WorkFlow Module.

The Field selected will determine the options available for Operator and Type. If the field type is not a number or date then the operators available will be 'Equal To' or 'Not Equal To'. For number and date fields you can also choose from additional logical operators; 'Less Than', 'Greater Than', 'Less Than or Equal To' or 'Greater Than or Equal To'.

Condition Types
You can specify workflow processes to trigger on different condition types. These are as follows:
-
Value – This is used to directly compare the Field to a value. The value type offered is dynamic to the field type of the Field selected. For example, if the field type is a drop down then the value field type will be the same drop down list.

-
Field – This is used to action a workflow process when one field is compared to another field in the record.

-
Multiple – This can be selected if the Field is a drop down/multiselect. This allows users to specify multiple values to action the workflow from.

-
Date – This allows you to specify the workflow to occur after/before an amount of time from either another date field or 'Now'. For example, when the start date of a call is 'Now + 10 minutes'. This can only be used when the Field is a date field. The amount of time before or after the date can be specified in Minutes, Hours, Days, Weeks or Months.

Removing Conditions
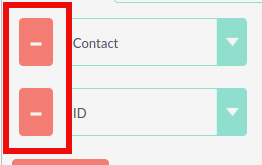
You can remove Condition Lines by clicking - on the left hand side of the condition.

Actions
Adding Actions
Actions are defined in the third panel. These specify what events should occur when the conditions have been met. You can add an Action by clicking the Add Action button.

This will cause the Action Line to appear.

From the Action Line you can Select Action and give it a Name. The actions available are; 'Create Record', 'Modify Record' and 'Send Email'. You can specify an unlimited amount of actions for each workflow process.
Create Record
If you select 'Create Record' you will be prompted to select a Record Type. This is the module type of the record you are looking to create.

Once selected you can add fields or relationships to this record using the Add Field and Add Relationship buttons.

When Adding fields the first drop down in the line will populate with all the fields from that module. The second drop down allows you to specify how the value for that field is going to be derived. For most cases the options are as follows:
-
Value – This will allow you to input the value directly using the same field type as the field selected.
-
Field – This will make the field the same value as a field found in the WorkFlow Module.
-
Date – Only selectable if the field is a date field. This will allow you to specify the value as an amount of time after/before another date field or 'Now'.

Selecting the 'Assigned-To' field also gives you more options. As well as by value and field you can assign a user by:
-
Round Robin – This will select each user in turn.
-
Least Busy – This will select you with the least amount of records assigned to you for that module.
-
Random – This will select a random user.
For each of the above options you can choose if you want you to be selected from all users or users from a specific role. If you have the SecuritySuite module installed you can additionally choose if you want you to be selected from all users from a particular Security Group or all users from a particular security group with a particular role.

When adding relationships you must select the related module from the drop down list then select the record that the new record should be related to.

You must selected the related module using the arrow button – The auto completion on the text field is not currently developed.
Modify Record
This provides the same functionality as 'Create Record' but instead of creating a new record you are modifying the record which met the conditions of the workflow process. With this action you can modify any field found within the record or you can add a relationship to another record. This is completed in the same way as 'Create Record' except you are not required to specify the Record Type.
Send Email
The 'Send Email' action allows users to create workflow processes which will send an email based on an template to individuals. Using this action there are four different types of recipient.
-
Email – This will send an email to a specific email address. You must specify the email address and the email template.

-
Record Email – This will send an email to the primary email address specified on the record which actioned the workflow process. This can only be used if the record has an email field such as Accounts and Contacts. For this option you only need to specify the template.

-
User – This will send the email to a specified Users email address. You must specify the recipient user and the template of the email.

-
Related Field – This will send an email to the primary email address specified on a related modules record. In this case you must specify the related module (From a drop down list) and the email template.

Calculate Fields
If you select 'Calculate Fields' from the Action dropdown the Calculate Fields user interface will be loaded after a second and looks like the picture below.

Calculate Fields - Adding parameters
It is possible to add parameters to the formulas by using the dropdown in the Parameters section of the Calculate Fields’s user interface. The dropdown contains all of the (basic and custom) fields which belongs to the module selected in the basic fields section.
To add a parameter, select the field from the dropdown and click Add parameter. After this action, a new line appears in the parameter table with the name of the field and the given identifier.
For some fields (dropdowns and multi-selects) an additional dropdown shown up where the user can select if the raw or the formatted value should be used in Calculated Fields. The raw format means the value which is stored in the database and the formatted value means the label for that database value.
To remove a parameter from the table, simply click the - in the row of the parameter. Be aware, that if you remove a parameter, all of the identifiers are recalculated, so the identifiers could change for fields!

The identifier is used to reference this field when the user creates the formula. For example all appearances of the {P0} identifier will be replaced with the Account’s name in the formula. All parameters are like {Px} where x is the sequential order of the parameter. The amount of the parameters is not limited.
Calculate Fields - Adding relation parameters
Relation parameters are very similar to the regular parameters, the only difference is that the user first selects an entity which is in a one-to-one or one-to-many relationship with the actual entity.
To add a relation parameter, select the relation first, and then select the field from the connected entity and push the Add relation parameter button. After this action, a new line appears in the relation parameter table with the name of the relationship, the name of the field and the given identifier.
As for parameters for some relation parameter fields (dropdowns and multi-selects) an additional dropdown shown up where the user can select if the raw or the formatted value should be used in Calculate Fields.
To remove a relation parameter from the table, simply click on the - button in the row of the relation parameter. Be aware, that if you remove a relation parameter, all of the identifiers are recalculated, so the identifiers could change for fields!

The identifier is used to reference this field when the user creates the formula. For example all appearances of the {R0} identifier will be replaced with the creator user‘s username in the formula. All relation parameters are like {Rx} where x is the sequential order of the relation parameter. The amount of the relation parameters is not limited.
Calculate Fields - Creating formula for a field
In the Formulas part of the user interface the user can add formulas for fields of the actual entity.
To add a formula, select a field from the dropdown first and then push the Add formula button. After this action, a new line appears in the formula table with the name of the field and with the place for the formula.
To remove a formula from the table, simply click on the - in the row of the formula.

The formula is a textbox where the user can write the formulas. The module evaluates the formula on the given time (on save, on scheduler run or both) and fills the selected field with the evaluated value.
The formula can contain any text (with full UTF-8 support), but only the function parts (functions with parameters between ‘{‘ and ‘}’) are evaluated. For example and with the parameters added in the previous sections, if we fill the formula like: Account {P0} created by user name {R0}, then the description field will have the following value after save: Account My Account created by user name MyUser (implying the account’s name is My Account and the creator user’s username is MyUser).
The Calculate Fields has many built-in functions which allows the user to build complex formulas to achieve various goals. These functions are described in the next section.
Calculate Fields - Usable functions
As it is mentioned above, all of the functions are wrapped between ‘{‘ and ‘}’ signs, and they look like {functionName(parameter1; parameter2; …)}. The count of the parameters are different for the different functions. The module evaluates the functions and changes them with their result in the formula.
The functions can be embedded into each other (using a result of a function as a parameter for another function) like in this example:
This function is the formalised look of the following mathematical expression:
((((10 * 2) + 12) / 8) – 1)2
The functions are divided to six groups. These groups are described in the next section of the document.
Logical Functions
Logical functions are returning true or false in the form of 1 and 0 so checkboxes typed fields can be filled with these functions. They can be also used as the logical condition for the ifThenElse function.
equal
Signature |
{equal(parameter1;parameter2)} |
Parameters |
parameter1: can be any value of any type |
parameter2: can be any value of any type |
|
Description |
Determines if parameter1 equals with parameter2 |
Returns |
1 if the two parameters are equal or 0 if not |
Example call |
{equal(1; 2)} returns 0 |
notEqual
Signature |
{notEqual(parameter1; parameter2)} |
Parameters |
parameter1: can be any value of any type |
parameter2: can be any value of any type |
|
Description |
Determines if parameter1 not equals with parameter2 |
Returns |
0 if the two parameters are equal or 1 if not |
Example call |
{notEqual(1; 2)} returns 1 |
greaterThan
Signature |
{greaterThan(parameter1; parameter2)} |
Parameters |
parameter1: can be any value of any type |
parameter2: can be any value of any type |
|
Description |
Determines if parameter1 greater than parameter2 |
Returns |
1 if parameter1 greater than parameter2, 0 if not |
Example call |
{greaterThan(3; 3)} returns 0 |
greaterThanOrEqual
Signature |
{greaterThanOrEqual(parameter1; parameter2)} |
Parameters |
parameter1: can be any value of any type |
parameter2: can be any value of any type |
|
Description |
Determines if parameter1 greater than or equal parameter2 |
Returns |
1 if parameter1 greater than or equal parameter2, 0 if not |
Example call |
{greaterThanOrEqual(3; 3)} returns 1 |
lessThan
Signature |
{lessThan(parameter1; parameter2)} |
Parameters |
parameter1: can be any value of any type |
parameter2: can be any value of any type |
|
Description |
Determines if parameter1 less than parameter2 |
Returns |
1 if parameter1 less than parameter2, 0 if not |
Example call |
{lessThan(3; 3)} returns 0 |
lessThanOrEqual
Signature |
{lessThanOrEqual(parameter1; parameter2)} |
Parameters |
parameter1: can be any value of any type |
parameter2: can be any value of any type |
|
Description |
Determines if parameter1 less than or equal parameter2 |
Returns |
1 if parameter1 less than or equal parameter2, 0 if not |
Example call |
{lessThanOrEqual(3; 3)} returns 1 |
empty
Signature |
{empty(parameter)} |
Parameters |
parameter: text value |
Description |
Determines if parameter is empty |
Returns |
1 if parameter is empty, 0 if not |
Example call |
{empty(any text)} returns 0 |
notEmpty
Signature |
{notEmpty(parameter)} |
Parameters |
parameter: text value |
Description |
Determines if parameter is not empty |
Returns |
1 if parameter is not empty, 0 if empty |
Example call |
{notEmpty(any text)} returns 1 |
not
Signature |
{not(parameter)} |
Parameters |
parameter: logical value |
Description |
Negates the logical value of the parameter |
Returns |
1 if parameter is 0, 0 if parameter is 1 |
Example call |
{not(0)} returns 1 |
and
Signature |
{and(parameter1; parameter2)} |
Parameters |
parameter1: logical value |
parameter2: logical value |
|
Description |
Applies the AND logical operator to two logical values |
Returns |
1 if parameter1 and parameter2 is 1, 0 if any parameters are 0 |
Example call |
{and(1; 0)} returns 0 |
or
Signature |
{or(parameter1; parameter2)} |
Parameters |
parameter1: logical value |
parameter2: logical value |
|
Description |
Applies the OR logical operator to two logical values |
Returns |
1 if parameter1 or parameter2 is 1, 0 if both parameters are 0 |
Example call |
{or(1; 0)} returns 1 |
Text Functions
Text functions are used to manipulate text in various ways. All the functions listed here are fully supports UTF-8 texts, so special characters should not raise any problems.
substring
Signature |
{substring(text; start; length)} |
Parameters |
text: text value |
start: decimal value |
|
length [optional parameter]: decimal value |
|
Description |
Cuts the substring of a text field from start. If the length optional parameter is not set, then it cuts all characters until the end of the string, otherwise cuts the provided length. Indexing of a text’s characters starting from 0. |
Returns |
Substring of the given text |
Example call |
{substring(This is my text; 5)} returns is my text |
{substring(This is my text; 5; 5)} returns is my |
length
Signature |
{length(parameter)} |
Parameters |
parameter: text value |
Description |
Count the characters in a text. |
Returns |
The count of the characters in a text. |
Example call |
{length(sample text)} returns 11 |
replace
Signature |
{replace(search; replace; subject)} |
Parameters |
search: text value |
replace: text value |
|
subject: text value |
|
Description |
Replace all occurrences of search to replace in the text subject. |
Returns |
subject with replaced values. |
Example call |
{replace(apple; orange; This is an apple tree)} returns This is an orange tree |
position
Signature |
{position(subject; search)} |
Parameters |
subject: text value |
search: text value |
|
Description |
Find position of first occurrence of search in a subject |
Returns |
Numeric position of search in subject or -1 if search not present in subject |
Example call |
{position(Where is my text?; text)} returns 12 |
lowercase
Signature |
{lowercase(parameter)} |
Parameters |
parameter: text value |
Description |
Make text lowercase |
Returns |
The lowercased text. |
Example call |
{lowercase(ThIs iS a sAmPlE tExT)} returns this is a sample text |
uppercase
Signature |
{uppercase(parameter)} |
Parameters |
parameter: text value |
Description |
Make text uppercase |
Returns |
The uppercased text. |
Example call |
{uppercase(ThIs iS a sAmPlE tExT)} returns THIS IS A SAMPLE TEXT |
Mathematical functions
Mathematical functions are used to manipulate numbers in various ways. Several mathematical operators are implemented as functions in Calculate Fields.
add
Signature |
{add(parameter1; parameter2)} |
Parameters |
parameter1: number value |
parameter2: number value |
|
Description |
Adds parameter1 and parameter2 |
Returns |
The sum of parameter1 and parameter2 |
Example call |
{add(3.12; 4.83)} returns 7.95 |
subtract
Signature |
{subtract(parameter1; parameter2)} |
Parameters |
parameter1: number value |
parameter2: number value |
|
Description |
Subtracts parameter2 from parameter1 |
Returns |
The distinction of parameter2 and parameter1 |
Example call |
{subtract(8; 3)} returns 5 |
multiply
Signature |
{multiply(parameter1; parameter2)} |
Parameters |
parameter1: number value |
parameter2: number value |
|
Description |
Multiplies parameter1 and parameter2 |
Returns |
The product of parameter1 and parameter2 |
Example call |
{multiply(2; 4)} returns 8 |
divide
Signature |
{divide(parameter1; parameter2)} |
Parameters |
parameter1: number value |
parameter2: number value |
|
Description |
Divides parameter2 with parameter1 |
Returns |
The division of parameter2 and parameter1 |
Example call |
{divide(8; 2)} returns 4 |
power
Signature |
{power(parameter1; parameter2)} |
Parameters |
parameter1: number value |
parameter2: number value |
|
Description |
Raises parameter1 to the power of parameter2 |
Returns |
parameter1 raised to the power of parameter2 |
Example call |
{power(2; 7)} returns 128 |
squareRoot
Signature |
{squareRoot(parameter)} |
Parameters |
parameter: number value |
Description |
Calculates the square root of parameter |
Returns |
The square root of parameter |
Example call |
{squareRoot(4)} returns 2 |
absolute
Signature |
{absolute(parameter)} |
Parameters |
parameter: number value |
Description |
Calculates the absolute value of parameter |
Returns |
The absolute value of parameter |
Example call |
{absolute(-4)} returns 4 |
Date functions
There are several date functions implemented in Calculate Fields, so the user can manipulate dates in many ways. Most of the functions uses a format parameter, which is used to set the result of the functions formatted as the user wants to. The options for these formats are equivalent with the PHP format parameters:
| Format character | Description | Example returned values |
|---|---|---|
For day |
||
d |
Day of the month, 2 digits with leading zeros |
01 to 31 |
D |
A textual representation of a day, three letters |
Mon through Sun |
j |
Day of the month without leading zeros |
1 to 31 |
l |
A full textual representation of the day of the week |
Sunday through Saturday |
N |
ISO-8601 numeric representation of the day of the week |
1 (for Monday) through 7 (for Sunday) |
S |
English ordinal suffix for the day of the month, 2 characters |
st, nd, rd or th. Works well with j |
w |
Numeric representation of the day of the week |
0 (for Sunday) through 6 (for Saturday) |
z |
The day of the year (starting from 0) |
0 through 365 |
For week |
||
W |
ISO-8601 week number of year, weeks starting on Monday |
42 (the 42nd week in the year) |
For month |
||
F |
A full textual representation of a month, such as January or March |
January through December |
m |
Numeric representation of a month, with leading zeros |
01 through 12 |
M |
A short textual representation of a month, three letters |
Jan through Dec |
n |
Numeric representation of a month, without leading zeros |
1 through 12 |
t |
Number of days in the given month |
28 through 31 |
For year |
||
L |
Whether it’s a leap year |
1 if it is a leap year, 0 otherwise |
o |
ISO-8601 year number. This has the same value as Y, except that if the ISO week number (W) belongs to the previous or next year, that year is used instead |
1999 or 2003 |
Y |
A full numeric representation of a year, 4 digits |
1999 or 2003 |
y |
A two digit representation of a year |
99 or 03 |
For time |
||
a |
Lowercase Ante meridiem and Post meridiem |
am or pm |
A |
Uppercase Ante meridiem and Post meridiem |
AM or PM |
B |
Swatch Internet time |
000 through 999 |
g |
12-hour format of an hour without leading zeros |
1 through 12 |
G |
24-hour format of an hour without leading zeros |
0 through 23 |
h |
12-hour format of an hour with leading zeros |
01 through 12 |
H |
24-hour format of an hour with leading zeros |
00 through 23 |
i |
Minutes with leading zeros |
00 to 59 |
s |
Seconds, with leading zeros |
00 through 59 |
For timezone |
||
e |
Timezone identifier |
UTC, GMT, Atlantic/Azores |
l |
Whether or not the date is in daylight saving time |
1 if Daylight Saving Time, 0 otherwise |
O |
Difference to Greenwich time (GMT) in hours |
+0200 |
P |
Difference to Greenwich time (GMT) with colon between hours and minutes |
+02:00 |
T |
Timezone abbreviation |
EST, MDT |
Z |
Timezone offset in seconds. The offset for timezones west of UTC is always negative, and for those east of UTC is always positive. |
-43200 through 50400 |
For full date/time |
||
c |
ISO 8601 date |
2004-02-12T15:19:21+00:00 |
r |
RFC 2822 formatted date |
Thu, 21 Dec 2000 16:01:07 +0200 |
U |
Seconds since the Unix Epoch (January 1 1970 00:00:00 GMT) |
|
For all functions without timestamp parameter, we assume that the current date/time is 2016.04.29. 15:08:03
date
Signature |
{date(format; timestamp)} |
Parameters |
format: format text |
timestamp: date/time value |
|
Description |
Creates a date in the given format |
Returns |
timestamp in the given format |
Example call |
{date(ymd; 2016-02-11)} returns 160211 |
now
Signature |
{now(format)} |
Parameters |
format: format text |
Description |
Creates the actual date/time in the given format |
Returns |
Current date/time in the given format |
Example call |
{now(Y-m-d H:i:s)} returns 2016-04-29 15:08:03 |
yesterday
Signature |
{yesterday(format)} |
Parameters |
format: format text |
Description |
Creates yesterday’s date/time in the given format |
Returns |
Yesterday’s date/time in the given format |
Example call |
{yesterday(Y-m-d H:i:s)} returns 2016-04-28 15:08:03 |
tomorrow
Signature |
{tomorrow(format)} |
Parameters |
format: format text |
Description |
Creates tomorrow’s date/time in the given format |
Returns |
Tomorrow’s date/time in the given format |
Example call |
{tomorrow(Y-m-d H:i:s)} returns 2016-04-30 15:08:03 |
datediff
Signature |
{datediff(timestamp1; timestamp2; unit)} |
Parameters |
timestamp1: date/time value |
timestamp2: date/time value |
|
unit: years/months/days/hours/minutes/seconds; default: days |
|
Description |
Subtracts timestamp2 from timestamp1 |
Returns |
The difference between the two dates returned in unit |
Example call |
{datediff(2016-02-01; 2016-04-22; days)} returns 81 |
addYears
Signature |
{addYears(format; timestamp; amount)} |
Parameters |
format: format text |
timestamp: date/time value |
|
amount: decimal number |
|
Description |
Adds amount years to timestamp |
Returns |
Incremented date in format |
Example call |
{addYears(Ymd; 2016-04-22; 1)} returns 20170422 |
addMonths
Signature |
{addMonths(format; timestamp; amount)} |
Parameters |
format: format text |
timestamp: date/time value |
|
amount: decimal number |
|
Description |
Adds amount months to timestamp |
Returns |
Incremented date in format |
Example call |
{addMonths(Ymd; 2016-04-22; 1)} returns 20160522 |
addDays
Signature |
{addDays(format; timestamp; amount)} |
Parameters |
format: format text |
timestamp: date/time value |
|
amount: decimal number |
|
Description |
Adds amount days to timestamp |
Returns |
Incremented date in format |
Example call |
{addDays(Ymd; 2016-04-22; 1)} returns 20160423 |
addHours
Signature |
{addHours(format; timestamp; amount)} |
Parameters |
format: format text |
timestamp: date/time value |
|
amount: decimal number |
|
Description |
Adds amount hours to timestamp |
Returns |
Incremented date in format |
Example call |
{addHours(Ymd H:i:s; 2016-04-22 23:30; 5)} returns 20160423 04:30:00 |
addMinutes
Signature |
{addMinutes(format; timestamp; amount)} |
Parameters |
format: format text |
timestamp: date/time value |
amount: decimal number |
Description |
Adds amount minutes to timestamp |
Returns |
Incremented date in format |
Example call |
{addMinutes(Ymd H:i:s; 2016-04-22 22:58; 5)} returns 20160422 23:03:00 |
addSeconds
Signature |
{addSeconds(format; timestamp; amount)} |
Parameters |
format: format text |
timestamp: date/time value |
|
amount: decimal number |
|
Description |
Adds amount seconds to timestamp |
Returns |
Incremented date in format |
Example call |
{addSeconds(Ymd H:i:s; 2016-04-22 22:58; 5)} returns 20160422 22:58:05 |
subtractYears
Signature |
{subtractYears(format; timestamp; amount)} |
Parameters |
format: format text |
timestamp: date/time value |
|
amount: decimal number |
|
Description |
Subtracts amount years from timestamp |
Returns |
Decremented date in format |
Example call |
{subtractYears(Ymd; 2016-04-22; 5)} returns 20110422 |
subtractMonths
Signature |
{subtractMonths(format; timestamp; amount)} |
Parameters |
format: format text |
timestamp: date/time value |
|
amount: decimal number |
|
Description |
Subtracts amount months from timestamp |
Returns |
Decremented date in format |
Example call |
{subtractMonths(Ymd; 2016-04-22; 5)} returns 20151122 |
subtractDays
Signature |
{subtractDays(format; timestamp; amount)} |
Parameters |
format: format text |
timestamp: date/time value |
|
amount: decimal number |
|
Description |
Subtracts amount days from timestamp |
Returns |
Decremented date in format |
Example call |
{subtractDays(Ymd; 2016-04-22; 5)} returns 20160417 |
subtractHours
Signature |
{subtractHours(format; timestamp; amount)} |
Parameters |
format: format text |
timestamp: date/time value |
|
amount: decimal number |
|
Description |
Subtracts mount hours from timestamp |
Returns |
Decremented date in format |
Example call |
{subtractHours(Ymd H:i:s; 2016-04-22 12:37; 5)} returns 20160422 07:37:00 |
subtractMinutes
Signature |
{subtractMinutes(format; timestamp; amount)} |
Parameters |
format: format text |
timestamp: date/time value |
|
amount: decimal number |
|
Description |
Subtracts amount minutes from timestamp |
Returns |
Decremented date in format |
Example call |
{subtractMinutes(Ymd H:i:s; 2016-04-22 12:37; 5)} returns 20160422 12:32:00 |
subtractSeconds
Signature |
{subtractSeconds(format; timestamp; amount)} |
Parameters |
format: format text |
timestamp: date/time value |
amount: decimal number |
Description |
Subtracts amount minutes from timestamp |
Returns |
Decremented date in format |
Example call |
{subtractSeconds(Ymd H:i:s; 2016-04-22 12:37; 5)} returns 20160422 12:36:55 |
Control Functions
There is only one control function implemented in Calculate Fields so far, but this function ensures that the user can write very complex formulas with conditions. Since the functions can be embedded in each other, the user can write junctions with many branches.
ifThenElse
Signature |
{ifThenElse(condition; trueBranch; falseBranch)} |
Parameters |
condition: logical value |
trueBranch: any expression |
|
falseBranch: any expression |
|
Description |
Selects one of the two branches depending on condition |
Returns |
trueBranch if condition is true, falseBranch otherwise |
Example call |
{ifThenElse(\{equal(1; 1)}; 1 equals 1; 1 not equals 1)} returns 1 equals 1 |
Counters
There are several counters implemented in Calculate Fields which can be used in various scenarios.
The counters sorted into two groups:
-
Global counters: Counters which are incremented every time an affected formula is evaluated
-
Daily counters: Counters which resets every day. (Starting from 1)
In this chapter we assume that the counters current value is 4, so the incremented value will be 5 with the given format.
GlobalCounter
Signature |
{GlobalCounter(name; numberLength)} |
Parameters |
name: any text |
numberLength: decimal number |
|
Description |
Increments and returns the counter for name with length numberLength |
Returns |
Counter with length numberLength |
Example call |
{GlobalCounter(myName; 4)} returns 0005 |
GlobalCounterPerUser
Signature |
{GlobalCounterPerUser(name; numberLength)} |
Parameters |
name: any text |
numberLength: decimal number |
|
Description |
Increments and returns the counter for name for the user who creates the entity with length numberLength |
Returns |
Counter with length numberLength |
Example call |
{GlobalCounterPerUser(myName; 3)} returns 005 |
GlobalCounterPerModule
Signature |
{GlobalCounterPerModule(name; numberLength)} |
Parameters |
name: any text |
numberLength: decimal number |
|
Description |
Increments and returns the counter for name for the module of the entity with length numberLength |
Returns |
Counter with length numberLength |
Example call |
{GlobalCounterPerModule(myName; 2)} returns 05 |
GlobalCounterPerUserPerModule
Signature |
{GlobalCounterPerUserPerModule(name; numberLength)} |
Parameters |
name: any text |
numberLength: decimal number |
|
Description |
Increments and returns the counter for name for the user who creates the entity and for the module of the entity with length numberLength |
Returns |
Counter with length numberLength |
Example call |
{GlobalCounterPerUserPerModule(myName; 1)} returns 5 |
DailyCounter
Signature |
{DailyCounter(name; numberLength)} |
Parameters |
name: any text |
numberLength: decimal number |
|
Description |
Increments and returns the counter for name with length numberLength |
Returns |
Counter with length numberLength, or if the counter is not incremented this day then 1 with length numberLength |
Example call |
{DailyCounter(myName; 1)} returns 5 |
DailyCounterPerUser
Signature |
{DailyCounterPerUser(name; numberLength)} |
Parameters |
name: any text |
numberLength: decimal number |
Description |
Increments and returns the counter for name for the user who creates the entity with length numberLength |
Returns |
Counter with length numberLength, or if the counter is not incremented this day for this user then 1 with length numberLength |
Example call |
DailyCounterPerModule
Signature |
{DailyCounterPerModule(name; numberLength)} |
Parameters |
name: any text |
numberLength: decimal number |
|
Description |
Increments and returns the counter for name for the module of the entity with length numberLength |
Returns |
Counter with length numberLength, or if the counter is not incremented this day for this module then 1 with length numberLength |
Example call |
{DailyCounterPerModule(myName; 1)} returns 5 |
DailyCounterPerUserPerModule
Signature |
{DailyCounterPerUserPerModule(name; numberLength)} |
Parameters |
name: any text |
numberLength: decimal number |
|
Description |
Increments and returns the counter for name for the user who creates the entity and for the module of the entity with length numberLength |
Returns |
Counter with length numberLength, or if the counter is not incremented this day for the user who creates the entity and for this module then 1 with length numberLength |
Example call |
{DailyCounterPerUserPerModule(myName; 1)} returns 5 |
Example - Calculate monthly fee for an opportunity
Use Case
The user would like to calculate a monthly fee of an opportunity to a custom field by dividing the amount of the opportunity by the duration.
Setup
Our opportunities module has a dropdown field called Duration with values: (database value in brackets) 6 months [6], 1 year [12], 2 years [24]. There is also a currency field called Monthly.
Workflow
Go to WorkFlow module and create a new WorkFlow. Set the base options like the following:
Name: as you wish |
WorkFlow Module: Opportunities |
Status: Active |
Run: Only on save |
Run on: All records |
Repeated runs: checked |

We do not create any conditions, since we would like the WorkFlow to run on all opportunities.
Now, add an action and select Calculate Fields from the dropdown.
Then, add two fields from Opportunities as parameters. First, select Opportunity amount (amount) and add it as a parameter (it will be {P0}) then select Duration and the raw value option from the data type dropdown and add it as parameter two (it will be {P1}). There is no need to add any relational parameters for this formula.
Now, add a formula for the monthly field and fill the textbox with the following formula:
{divide({P0}; {P1})}
So the whole action should look like this:

Save the WorkFlow and create a new Opportunity:

As you can see, we did not even add the monthly field to the EditView, because we don’t want to force the user to make calculations. Save the Opportunity and check the results on the DetailView:

AOW Calculated Fields was contributed by diligent technology & business consulting GmbH
Removing Actions
You can remove Action Lines by clicking the x on the top right hand side of the Action.

Removing Field and Relationship Lines
You can remove Field and Relationship Lines by clicking the - on the left hand side of the Action.
Process Audit
Advanced OpenWorkflow allows users to audit your processes. In the Detail View of each WorkFlow record there is a sub-panel called 'Processed Flows'.

This lists all the workflow processes which have been actioned including details on the record which actioned the flow, its status and the date it was created.

You can view this information at a higher level by clicking the 'View Process Audit' button within the module action bar. This will show all the processes that have run for all the WorkFlow records.
Tutorials
Customers to Target List
This tutorial will show you how to create a workflow process to add accounts who are customers to a Target-List when the record is created or modified. Set Up
-
Start by navigating to the WorkFlow module and clicking 'Create Workflow' from the the action bar.
-
Give your workflow a Name such as 'Populate Target List.
-
Select Accounts as the WorkFlow Module.
-
Ensure Repeated Runs is NOT selected and the Status is Active (This should be done by default). Optionally you can change the Assigned-To and add a Description.
Conditions
-
Create a new Condition Line by clicking Add Condition.
-
Select 'Type' from the Field drop down.
-
Keep the Operator as 'Equals To' and the Type as 'Value'.
-
From the Value drop down select 'Customer'.
Once these steps have been completed the Conditions panel should look like this:

Actions
Create a new Action by clicking Add Action.
-
Select 'Modify Record from the Select Action drop down list.
-
Using the Name field, give the action a name such as 'Add to Target List'
-
Add a Relationship Line by clicking the Add Relationship button.
-
A drop down will appear above the 'Add Relationship' button. Select the relationship from this drop down box. In this case we are looking for 'Target Lists: Prospect List'
-
This will populate the rest of the line. Click the arrow button next to the relate field to select your target list.
Once these steps have been completed your Actions panel should look like this:

Cases Reminder
This tutorial will show you how to create a workflow process to notify the assigned user and then a particular manger user when an open Case has not been updated/modified within two days. Set Up
-
Start by navigating to the WorkFlow module and clicking 'Create Workflow' from the the action bar.
-
Give your workflow a Name such as 'Case Escalation'.
-
Select Cases as the WorkFlow Module.
-
Ensure Repeated Runs is NOT selected and the Status is Active (This should be done by default). Optionally you can change the Assigned-To and add a Description.
Once these steps have been completed the first panel should look like this:

Conditions
Create a new Condition Line by clicking Add Condition.
Select 'Date Modified' from the Field drop down.
Change the Operator to 'Less Than or Equal To' and the Type to 'Date'
From the Value fields select 'Now', '-', '2', 'Days' in order.
Once these steps have been completed the Conditions panel should look like this:

Repeat step 1.
This time select 'Status' from the Field drop down.
Keep the Operator as 'Equals To' and change the Type to 'Multiple'.
From the Value multi-select field select any values which signify an open case
Once these steps have been completed the Conditions panel should look like this:

Actions
-
Create a new Action by clicking Add Action button.
-
Select 'Send Email' from the Select Action down down list.
-
Give the action a Name such as 'Assigned User Reminder'
-
On the Email Line select 'Related Field' from the first drop down, 'Users: Assigned To' from the second drop down and a email template from the third drop down.
Once these steps have been completed the Actions panel should look like this:

Repeat steps 1, 2 and 3 but change the name of this action to 'Manager Escalation Email'. 2. On the Email Line select 'User' and then select you who should receive the email. Select an email template from the third drop down. 3. When you are finished click Save to create your workflow. Once these steps have been completed the Actions panel should look like this:

Follow Up Web Leads
This tutorial will show you how to create a workflow process to assign web Leads to a particular user from a particular role within SuiteCRM. This user will be chosen by round robin. The workflow process will also set a follow up call for one day after the Lead is created.
You can change the Sales role to any role found in your own system.
Set Up
-
Start by navigating to the WorkFlow module and clicking 'Create Workflow' from the the action bar.
-
Give your workflow a Name such as 'Web Lead Assignment and Follow Up'.
-
Select Leads as the WorkFlow Module.
-
Ensure Repeated Runs is NOT selected and the Status is Active (This should be done by default). Optionally you can change the Assigned-To and add a Description.
Once these steps have been completed the first panel should look like this:

Conditions
-
Create a new Condition Line by clicking Add Condition.
-
Select 'Lead Source' from the Field drop down.
-
Keep the Operator as 'Equals To' and the Type as 'Value'
-
From the Value drop down select our condition, 'Web Site'
Once these steps have been completed the Conditions panel should look like this:

Actions
-
Create a new Action by clicking Add Action.
-
Select 'Modify Record' from the Select Action down down list.
-
Using the Name field, give the action a name such as 'Assign to Sales'
-
Add a Field Line by clicking Add Field.
-
Select 'Assigned-To' from the new drop down box that has appeared above the Add Field button.
-
Change the middle drop down box from 'Value' to 'Round Robin'
-
Change the third drop down box from 'ALL Users' to 'ALL Users in Role'
-
Select from forth drop down box on the line 'Sales'.
Once these steps have been completed the Actions panel should look like this:

-
Now create a new Action by repeating step 1.
-
This time select 'Create Record' from the Select Action down down list.
-
Using the Name field, give the action a name such as 'Create Follow Up Call'.
-
From the Record Type drop down select 'Calls'.
-
Click the Add Field button to add a new field:
-
Select 'Subject' from the first drop down box. Leave the second drop down box as 'Value' then type the desired subject into the text field at the end.
-
Add another field, this time selecting the 'Start Date' from the first drop down box.
-
Change the second drop down box from 'Value' to 'Date'.
-
In the third drop down box select 'Now'. In the fourth drop down box on the line select '+'.
-
In the text box type '1' and in the drop down next to it select 'Days'.
-
Add another field, this time select 'Assigned-To', 'Field', 'Assigned-To' – This will relate the assigned User of the Lead to the Call.
-
You can add any other fields that you wish to include in the call at this stage. To finish click Save.
Once these steps have been completed the Actions panel should look like this:
